If you’ve ever admired a piece of furniture or guitar with striking, three-dimensional-looking wood grain, chances are dye was part of the secret. Unlike paint or pigmented stains that sit on top of the wood, dyes penetrate deep into the fibers, enhancing figure and grain in a way that looks rich and dramatic. This technique—often called “popping the grain”—is something any woodworker can learn.
Here’s how to do it step by step.
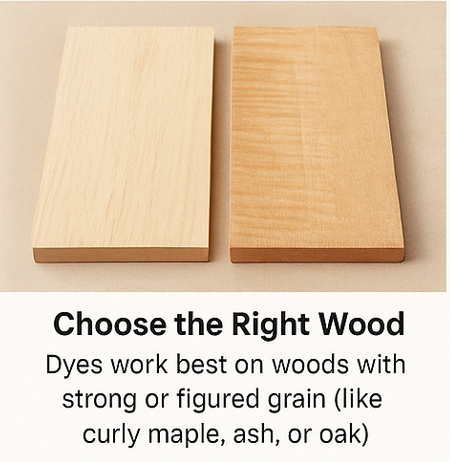
1. Start with the Right Wood
Dyes work best on figured woods like curly maple, birdseye maple, ash, or oak—species where the grain naturally catches light at different angles. Plain boards can still look good, but figured wood is where dyes truly shine.
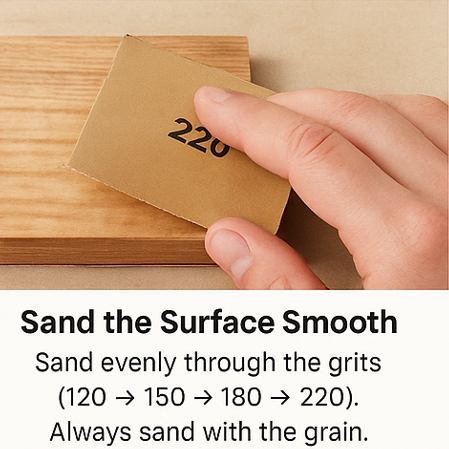
2. Sand Carefully
Surface prep makes or breaks the finish. Sand through the grits evenly, stopping at 220. Be careful not to round edges or leave scratches, as dye will highlight every flaw. A final hand-sanding with the grain ensures smooth absorption.
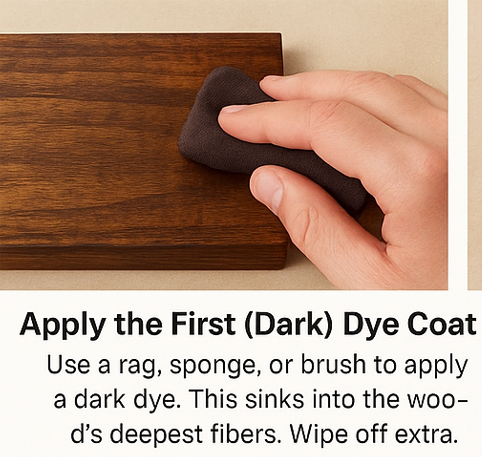
3. Apply a Base Dye Coat
The first coat of dye establishes your base color. Many woodworkers choose a darker tone (like dark brown, amber, or even black) to sink into the deepest parts of the grain. Apply it evenly using a rag, sponge, or brush. Wipe off excess and let it dry completely.
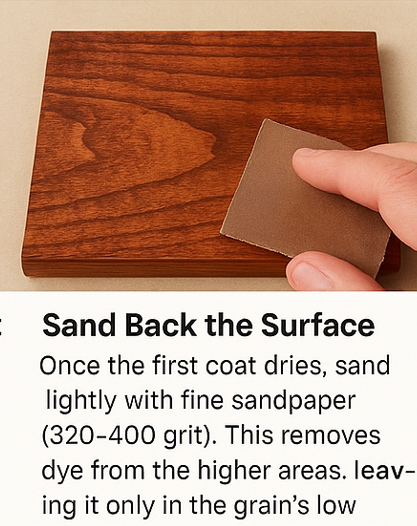
4. Sand Back the Surface
This is the trick that really pops the grain. Once the first coat is dry, lightly sand the surface again with fine paper (320–400 grit). This removes dye from the higher, flat areas of the wood while leaving the darker color deep in the figure. What’s left is natural contrast: dark in the low spots, light on the surface.
5. Add a Second Dye Color
After sanding back, apply a second coat of dye—usually a lighter or brighter color (reds, blues, or golden ambers are popular). This second color blends with the first, creating depth and dimension that plain stain can’t achieve. You can repeat layering and sanding if you want a more dramatic effect.
6. Lock It In with a Clear Finish
Dyes are beautiful but delicate—they can fade or lift if not sealed with a UV resistant finish . Once you’re happy with the look, protect your work with a clear topcoat like lacquer, shellac, or polyurethane. Water based finishes that are water clear work great on colors when you want to maintain the color without any warm amber cast. Always test on a scrap piece before committing to your final project.
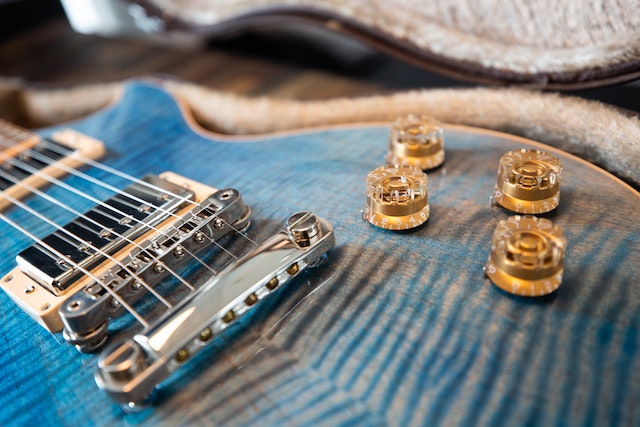
Here is our Maple Guitar after following the above steps showing the beautiful Popped Grain
Pro Tips
- Test first: Always practice your dye schedule on an offcut from the same wood.
- Mix your own strength: Dyes can be diluted with water or alcohol for more subtle tones.
- Blend creatively: Layering colors (like a dark undercoat with a vibrant topcoat) can create custom effects.
Final Thoughts
Using dyes to pop the grain is one of the most rewarding finishing techniques in woodworking. It’s a little more work than applying a single coat of stain, but the results are dramatic—turning ordinary boards into eye-catching, professional-level projects. Once you try it, you may never look at wood finishing the same way again.